Chip fire - the beads are great

Gold Refining Forum

Help Support Gold Refining Forum:

This site may earn a commission from merchant affiliate links, including eBay, Amazon, and others.

dannlee

Well-known member
Joined
Aug 12, 2013
Messages
118
Location
Twin Cities MN
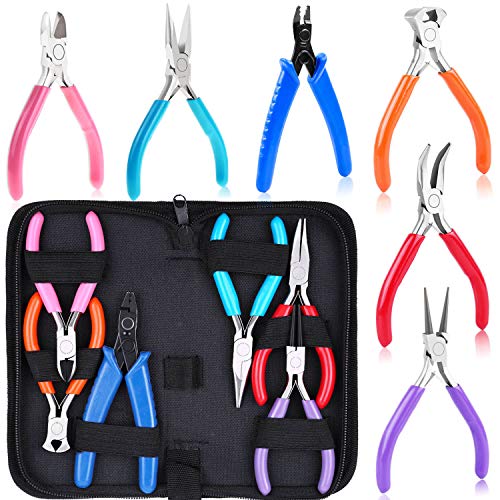
Here is a share about getting a few things apart on the cheap, a beginners study on methods & values from salvaging ‘just’ two early 1990’s laptop notebooks. As a cure for cabin fever, I stripped laptop chassis and cut everything apart, snipped caps off PCBs then oven pre-heated and depopulated by heat-gun…

The bulk waste from the units got stuffed into an old printer housing and sent to free recycling at a big-box retail store (surprise!) and the copper and aluminum went off to salvage yard along with a couple of buckets of junk from the basement ($43, no complaints) plus every gold plated piece sorted away for a future clean-up. Then last week we had a day last week above freezing (yippee!) that saw me digging out the snow from BBQ area to uncover my #30 propane tank.

For this version of my incinerator: I stacked together $15 (box of six) 4-1/2" x 9" x 1-1/4" firebricks on top of a 12”x18” sheet of 5/8” drywall. I lined the tiny firebox with 3/16” fiberfrax aluminosilicate insulation I’d nabbed a roll of some time back, and fired up my $15 Harbor Freight (Coupon) 500K Btu torch with everything perched safely on top of my trusty Weber grill.

Once the fiberfrax latex binder cleared off I started dropping chips down the flue. About 35% bounced into bad locations efficient burn wise so I will be playing with placing them with a ladle next time. Had chips stacking and not firing up well too, so am looking into a way to jounce them around and/or tumble them, or have swappable stacking trays w/ lift rings. I have nabbed a chunk of titanium alloy mesh to see if It will do a rocker or shaker plate to keep chips out of corners or wedging to the floor away from heat flow. So far, I have more than three or four kilos of chips stashed so I cannot help not scheming faster & smoother production line methods for small scale reclaiming.

Lobbing plastic/epoxy chips into the near blue-hot firebox was like dripping naphtha or gasoline into a fire, very vigorous fireball with near zero smoke and almost no smell since there was surplus propane acting on it. For urban camouflage, using a small system with very high temperatures seems a good place to be; the only smell was a very faint asphalt or hot rubber odor.

beads_1.jpg

Also, on incinerating effectively, I’m looking to explore using a reverse-draft or semi-spiral flow burner to slow down or stagger that hyperactive fume cloud, then give it a place to expand into before it leaps into the sky to keep it super-heated longer for an efficient & cleaner burn. On this trial by doing a 45° to 60° downwards bounce of the flame off the floor into the back wall got the chips surfaces incandescent blue hot that I had me thinking to myself was impressive to watch – then I hit the gas valve ‘turbo’ wide-open lever and saw the chips go to white-hot-shimmering-like-mirrors HOT.

The insulation layer over the firebrick sure improves efficiency even if this choice of insulation has the strength of angel food cake once fired. High temperature I got with most of the bonding wires reduced to gold beads, with plenty of gold alloy & copper beads too… but still had lumps of hard char to sort. I have no pictures of the chips beforehand, not more than six ounces or so. I also did not time the length of the burn as I’d had gotten impatient from being indoors too long and this was just a trial run, could not have been more than 10 minutes as I am propane stingy with that thirsty burner.

beads_2.jpg

First mistake: not eliminating the 60/40 solder before processing chips, the razor cut-away method was NOT used separating chips from the PCBs and that would have helped. Standing next to it looking down at the black stains on pure white ceramic insulation from solder made me think atomizing Lead long term is not the brightest idea.

Another mistake: saving the large chips until last, drop those 386-486’s etc. in first to give them enough time to ash thoroughly. I thought making a bed of smaller chips for big ones to perch on would work fast enough to not be a waste of propane to process them, but plainly, the processing of large (old) chips is more a function of time at temperature versus peak surface temperature.

The results: about 1/3 of the ash screened easily through 0.6mm mesh, 1/3 was larger magnetic chaff with attached ash lumps taken off the screen without rubbing any down or pulverizing, that other 1/3 was char hunks portion from the larger chips.

beads_3.jpg

beads_4.jpg

beads_5.jpg

I think I like the ‘wires into beads’ burn. So far am not seeing traces of gold wire stubs at the spot welds on the kovar leads so far, but have not finished washing/separating/processing the magnetics completely.

Five photo limit, result beads on next post.
 
So… Those fine ashes got water washed then 200°F double-boiler hydrochloric-peroxide cleaning for 90 minutes (without added copper CuCl helper) and after a good while passed of no visible reaction the fines were rinsed well and swirled to get the beads against the glass to show a not bad pay-streak (in my opinion). Some values were lost letting the finest silt and ash drain to waste after AP that could/should have been settled/saved, and discarded the 200ml of AP since I have no safe holding area yet.

beads_6.jpg

I see some raw copper in the close-up so I am wondering if it is worth etching those away before the AR step, though still a few weeks away on that.

beads_7.jpg

beads_8.jpg

So far I’m not able to process Aqua Regia using nitric due to no dedicated secure building/room, I sure can see being able to have things safe, unmolested and well away from household & activities is worth its weight in gold. I have a 15-gallon barrel, pump and eductor to set up for a vacuum source and have the makings of a fume hood – all things to explore further once this miserable winter is over.

I am unsure how to process the magnetic portion the cheapest once I get a large weight of it set aside.

Little improvement ideas maybe worth looking into:

► Jounce or tumble chips in firebox so no cold spots.
► Quick-change stacking trays that are rocker/shaker plates too, keep large chips in while swapping out smaller ones.
► Reverse-draft and/or semi-spiral flow burn chamber
► Adding flue expansion chamber or second smoke shelf for cleaner burns
► Damper for closing it up so a continued small flame input will cheaply extend maximum heat soak.
► Try dual-fuel using coal with propane as after-burner for that ‘fireball minute’

Anyhow, thanks for reading, great forum, thought I’d share my first tiny pay-streak…
 
Looks like a good start. How hard was it to get the material off the insulation? Maybe a metal pan could be on the bottom to make it easier to collect the ashes?

The only incinerating of chips I have done so far was done in a tin can put in the house furnace. That seemed to work for small amounts and the fumes were either burnt or went up the chimney. Not everything burnt to ash but I was afraid to burn the bottom out of the can and lose my material in the furnace.

Keep going and document as much as you care to. I know I love to see what others come up with. You'll probably get lots of comments and suggestions and hopefully encouragement.
 
Looks like you found the gold. I like these kind of posts. It allows the new people to see and/or perform as a work in progress and allows the older hands to give advice and comments. Every one gets involved and they can make a great learning post. I am saving back a nice little collection of chips for later, possibly my next recovery effort so I find this very interesting as well.
 
waiting for my HCl/Clorox to heat up and then I'm going to put my SMB in for the 500 grams of mixed IC's (did the BGA chips seperatly) from 25 laptops. I got the nice same gold on the bottom of my beaker also!
 
I try to avoid forming of beads. When I harvest chips I cut them off board instead of using heat gun. In that way (it is longer) I just have less base metals to deal with. There is another way to do it, you can treat IC with warm nitric or let them sit in AP till legs dissolve prior to incineration. Less beads less work when panning or cleaning concentrate.
 
1 important safety note...
Your burn box is too close to the siding of the building.
You could inadvertantly start a fire under the siding from the heat build up.
I've seen a house fire where the firemen thought was out and left. Only to come back half hour later and discover flames ran up under the siding and set the 2nd floor ablaze.

Never enough safety in what we do.

B.S.
 
So – these lovely six grams of heat spreaders came out of the ashes, some shiny and relatively untouched from the heat soak.

What metal plating and solder alloys survives that heat? Some nice solder dregs hanging on too.

Here is something else I need to learn more about while I hunt more of them…
 

Attachments

  • beads9.jpg
    beads9.jpg
    108 KB · Views: 891
How hard was it to get the material off the insulation?

There is no rooting around items laying on this stuff, it is an omni-directional weave with the strength of a wet paper towel once the man'f - handling binders are driven off.

So chip fliers couldn’t just be flicked into a better spot – but most of the fliers were ricochets off other chips, not much bounce to a lightly dropped chip.

Doing a steady feed with careful loading until the burn finished & cooled down worked.

The ceramic felt lifted out of the brick box about like a soft felt cowboy cap, stiff enough it maintained its shape when handled carefully. I flipped the liner over and all but one chip dropped out, a nudge freed the caught one. Then only granules of solder smut were left, and one soft upside-down tap knocked 95% of those off.

The liner was then carefully placed in an empty shoe box to store until next time. About the third, fifth seventh burn it may shaggy enough to imitate Velcro - thus the expanded metal tray ideas.

EDIT: two softs
 
Less beads less work when panning or cleaning concentrate.

I really don’t know for myself since this is my first go-round.

I can appreciate aiming just for 23k wire fragments for a quicker payout.

Kovar spec melting temperature is 1450°C/2640°F. Does anyone know definitively if burning kovar hot enough so it strongly oxidizes while cooling... can/does that force the microscopic bond wire welds to spall or flake off clean/cleaner?

I already hate the stuff and would like to avoid mining small Au returns from it later on by working it hotter now…

For mechanical separation or condensing values that photo shows how well behaved beads are, diving to the bottom and grouping together, just do not expect them to act any differently and go after them accordingly?

With CuCl2, AR, dilution and ice cubes dropping metals easily is getting bond wires, plus everything that melts, condensed down into the same sets of beakers & filters really more work?

Maybe because I’ve chased gold flour and colors in river sands & gravel led me to think letting it go to bead shape would be a good method – make it drill down to the bottom of the pan & not get snagged or carried away by the ash/chunks.
 
Your burn box is too close to the siding of the building.

See the edge of a 3/16" aluminum BBQ lid heat shield in the shot? Four inches of ice crust on the far side of BBQ lid didn't budge. There was near-zero 'waste' heat.

I was wondering if I would get scolded for the phone camera lense distorting distances ... Six feet to left and two feet plus behind it. With a heat shield.

You got me thinking keep propane tank to where it be reached without heroics to safely to shut it off in case hose fails. Thanks. Really.

A safe bet I will move the work station after snow season turns into mud & bug season.
 
I took the medium ash bits, those middle sized screened kovar wires and chunks in the above photo, and ground them in mortar & pestle. Then a gentle water washing to float the ash clays out of it. Photo here is the screened heavy wires and silicon dies separated out after wash.

beads10.jpg

Ninety minutes of hot HCl-peroxide made a lot of lead/silver drop out as it cooled and I didn’t think I’d ever get it all removed when the four/five times I added water wash it fogged up with base metal clouds again.

beads11.jpg

Stannous test(s) show zero reaction. I drained off the AP into the first set of powders processed and boiled them so more too, getting more silver solder out of the beads.

One thing noteworthy was grinding the lead-bond wires in that slag made the gold a glass magnet – all the notches and barbs from the ceramic ash stamped into the gold makes some amount of them just want to hang on glass like hitchhiker weed seeds and blue jeans pants. The ONLY way I got the beakers(s) clean was holding them plumb on the vertical while pump spraying rinse water. My dear wife (DW) got a giggle showing her how only a quarter of the visible wires and dust rinse out at a time doing it any other way.

So I got a nice pay streak out of the middlings and they were added to the first batch, time to refire the large chunks…

beads12.jpg

edit: 1st picture steps out of order.
 
Okay - I'm impressed.

Burned down the remaining large chunks from the photo above and ground into superfine dust in a mortar and pestle.

Water washed the chip legs through 0.6mm screen, allowed ash silts to float off. Held just in double boiler at a simmer boiling temperature for 45 minutes in HCl-Peroxide.

Rinsed well. Took photo.

Of course its a tiny streak, about half the size of a USD Dime in a 250ml beaker, but I had thought the gold spiderwire would've already been freed up when I crushed them the first time.

Added these values to the prior condensed fines. Will do the first Aqua Regia process tomarrow!
 

Attachments

  • beads15.jpg
    beads15.jpg
    75 KB · Views: 771
nice post! I find the chips (ones containing gold) to be the best as far as PM yield per pound from computer scrap (not counting MLCC's).

I kinda screwed up on my first north/south bridge (epoxy/fiber) burn. I separated the black from the fiber then placed them all in HCl to dissolve the solder then I placed them all in a stainless pan and burned until white. what I found was that the fiberglass Inbetween the copper sheets on the fiber pieces did not ash. so I had to sort all those out before I did the nitric and second incineration and now I have a little pile of those pieces of fiber and copper foils. and also after incinerating 500 grams of mixed IC's I have all the pieces I picked up with the magnet before the first nitric. next time I'll do what patnor advises. leaving out most of the fiber part.

what should I do with those copper foils from the fiber chips and the magnetic pieces from the mixed IC's? think it's worth recovering any gold? can I just try a quick 90 min close to boil AP soak to loosen the gold and then pull the copper and magnetic pieces out and dissolve what's left in HCl/Cl? or just dissolve it all in AP? I would think any gold would just be on the surface on the material and can be easily separated by mech separation.
 
Realized skipping the Nitric 50/50 step would be poor. Also realized I'm not wanting to work with Nitric just yet, the HCl/Cl is tempting. So will nab some sulfamic acid and some sand for the mini hot plate (haven't seen grass, dirt or rocks here since Dec 5th) and check out my variac variable transformer, and set up a weathertite outdoor stand. Ruining this little drop would be bad for morale.

what should I (we!) do with those copper foils from the fiber chips

Caught red-chipped, yup. In that picture of the ashed chips there is the charred remains of a single green fiber chip... from another scrap tear-down one, one fiber chip got casually tossed into the first heat treatment. I took delight in punching the center out to see what was what. Black tar char and copper foil. The fiber was more like nomex bandage gauze. I ended understanding nearly nothing about the layout of the chip or where the values were in it after it was charred up so took a heat gun to another greenie and peeled back copper laminations and still haven't a clue. I did get some gold plate bits placed in a 'green thingie' vial.

beads16.jpg

I'm guessing here: center gold cap & visible values beneath separated. And the rest shredded, sheared into 0.125" strips, incinerated, ground(?).... and the tossed into used HCl/CuCl sounds brilliant.

what should I do with the magnetic pieces from the mixed IC's?

They heat treat kovar to build an oxide surface on it so glass and resins can have texture to grip, started in about 1951 with vacuum tubes. It's the cool down period that's controlled for that. Anyhow, I wonder if that can be exploited to mechanically separate the 1,000's of gold bearing weld points & wire nubs that cling to the magnetic chunks. I sure got a surprise by just grinding them (again?) in a ceramic mortar & pestle.

I'll go back and reheat my teeny token pile of magnetics and regrind to see if visible values appear.
 
HCl/Cl works, but it's slow on those wires that stay at the bottom of the beaker and I had to stir a lot to get them all. I decant and save the solids and all those copper foils from the fiber chips and magnetic bits from the mixed IC's. guess nitric again with all that should get rid of all the BM's and then another incineration and HCl/Cl would get any left overs. just don't think it's worth it with the cost of nitric and waste. or just do the copper in AP and toss the magnetic stuff.
 
Here's a couple pictures I took of some partially incinerated I.C. chips. The first one is a picture of some of the stuff I screened out to be re-incinerated. These were just ordinary I.C. chips. No processors.

chip parts.jpg

I took a close up picture of the little square metal pieces (?heat sinks?) with wires on the corners to see what the end of those wires looked like.

ic closeup.jpg

I can't tell for sure if this is gold but I would have expected it to be oxidised if it was just copper. I haven't run any tests on these parts yet. They are mostly magnetic.
 
i think my plan is to get another 500 grams of mixed IC's and run the magentic material from both batches only in 50/50 nitric, wash, incinerate, HCl/Cl and see what that yields.
 
I have misplaced my mapp torch so no finishing the magnetics today, the large propane burner would blast the fines out of the melting dish.

Did a heated nitric bath and got a nice silver return. Sure shrank the pay-streak, and am now cursed with floating wires and flakes. Tomorrow will be AR.

There are 4:1 & 5:1 Ag/Pd pastes used as high reliability general purpose solder with ~850°C firing temperatures, might explain the blacked oxides and leech mounds of still shiny metallic surfaces. If the solder was creeping around and the silver burning away, that would condense Pd purity, and if a gold bonding wire was absorbed into the fray it'd look something like that, a weird flavor of electrum... I am seeing the same here too, still about a grain of salt sized though :|

Color chart courtesy of http://en.wikipedia.org/wiki/Gold

Ag-Au-Cu-color_Wikipedia.jpg
 

Latest posts

Back
Top