The assay / refining lab.....second time around

Gold Refining Forum

Help Support Gold Refining Forum:

This site may earn a commission from merchant affiliate links, including eBay, Amazon, and others.
Status
Not open for further replies.

4metals

Moderator
Staff member
Supporting Member
Moderator
Joined
Apr 5, 2009
Messages
6,084
Location
northeast USA
Layout of a 10 by 20 garage for assay / refining


If I were to make a small refinery with a capacity for fire assay and acid refining the following working plan would be my starting point.

Divided down the long wall into 2 rooms 10 by 10 each. Access to the rear room through a 30” door.

The acid hood is on the end with the garage door.

The acid room contains a 4 foot long 30” deep hood and a scrubber. This hood will do double duty both as a hood for acid refining and a hood for assay parting. (not at the same time)
A cabinet to store all chemicals. (Heated with a thermostat and light bulbs for cold winters)
A sturdy work table. Windows behind the work table can provide make up air in warmer weather and can be equipped with an exhaust fan to remove dust if you are performing disassembly of e-scrap. Storage beneath, for drums and buckets.

The rear room has a section divided off to house an analytical balance and a balance room work table with cabinets above. The main part of the rear room has a metal hood to house an assay furnace which can do double duty as a melting furnace to melt your fine gold. You could also do limited burnouts in a metal hood. One wall has a sink for lab use and to be shared with the acid room, and a lab table with cabinets above.

If you were a one man show you could push out some serious refining out of a small place like this. All you need is the scrap.
 

Attachments

  • 10 x 20 garage plan.jpg
    10 x 20 garage plan.jpg
    24.5 KB · Views: 1,458
4metals said:
If you were a one man show you could push out some serious refining out of a small place like this. All you need is the scrap.
I was a one man show, and turned out one hell of a lot of gold and silver, and with far less space than you have provided.

Do keep in mind I had a lot more space for other appliances and devices, but my fume hood and counter area, which included a laundry type sink, was all contained within a space that was no more than 8' x 14'. That was by design, so I could perform all of the required functions without walking far.

Nice layout, 4 metals!

Harold
 
If you were going to describe the capacity of a refinery by the size of the reaction vessels, how would you characterize the following vessel sizes;

5 Liter
12 Liter
22 Liter
50 Liter
72 Liter

The number of vessels in use would also be relevant, but at what point does it become practical to use a larger vessel?

And with cylindrical and spherical vessels, do you generally work at about half full, or maybe a little more than half full? Need to leave room for foaming up?

The reason I ask is this affects the fume hood design. I do recall 4metals writing about using a 72 liter vessel outside of the hood, but I would rather have the vessel inside the hood, even if it is connected to a scrubber.

I'm curious to know what size vessel Harold generally used in his operation.

John
 
Semi

Based on the sizes you are listing you are talking about stock glass vessels with 4" conical necks. The nice thing about them is you can install a head on the reactor and direct the fume into a condenser which allows you to use less nitric. Plus the vessels are interchangeable because they all have 4" necks.

The standard loading capacity for karat gold is as follows
5 liter 20 T.O.
12 liter 50 T.O.
22 liter 100 T.O.
50 liter 200 T.O.
72 liter 300 T.O.

These quantities can be processed by filling the reactor a bit more than half way. The actual in practice numbers I use are 7.5 T.O. of total metal per liter of acid.

The following pictures are of a setup I did for a small refiner. The reactors are 5 and 22 liters. Notice the condensers are permanently mounted on the wall and connected by a corrugated teflon hose. This way the exhaust setup after the condenser is always lined up because the condenser never moves. Plus they're fragile and expensive so once they're mounted it is pretty safe and secure.
 

Attachments

  • 5L working.jpg
    5L working.jpg
    51 KB · Views: 1,413
  • 22 & 5 reactors.jpg
    22 & 5 reactors.jpg
    68.9 KB · Views: 1,414
Once again, thanks for the information. If I ever get this going, I'm going to have to send you a consultants fee. :)

Those look like Allihn condensers, maybe 500mm or so. I need one of them. I could go for those flasks too. :D

No fume hood at all in the picture. With the exhaust system and a little room ventilation, I guess you can get by without a hood. But I would still rather have one.

John
 
The condensers are vigereaux (sp?) type. 24" long for up to a 22 Liter flask with a 29/42 tapered fitting. The bigger reactors need a 36" condenser I believe with 45/50 fittings.

The reason I don't use fume hoods with the reactors is the exhaust is up so high due to the condenser it's hard to squeeze it all in. Besides, the reaction is contained, I never disassemble the reactor when it's hot, or even warm for that matter. Always the next day, so there are no fumes. All of the acid filtering and transferring and precipitation is done under a hood.

Another thing you probably can't see in the picture is the heads for the reactor are custom made. The leg connected to the condenser has a lot of condensed acid dribbling back into the reactor. In a normal head it dribbles down the side. This always seems to find its way across the ground glass seal and drip out. Never fast, but the clamps are metal, could never find them made of anything else, so first the paint goes and then the die cast and you're buying more clamps. I have my glassblower add a small extension inside the head so the acid drips down and falls back into the center of the reactor, away from the seal.

If you look in the photo of the 5 Liter reactor working there is a spare head on the shelf to the left. You can see the modification I'm talking about there.

A good scientific glassblower is a good guy to know. :D

Noxx edit: Vigreux condenser :p
 
4metals said:
The condensers are vigereaux (sp?)

Ahh "Vigreux" condensers. That's not what I'm looking for. I just want a simple condenser for a distillation rig.

All of the acid filtering and transferring and precipitation is done under a hood.

That makes sense. Handling those 22 liter flasks would require care and caution though, and a fifty liter would be a bit much to pick up and pour. I've been thinking about a tilting holder. I like to build computer models of anything I'm thinking of building, and that's the stage I'm in right now.

I have my glassblower add a small extension inside the head so the acid drips down and falls back into the center of the reactor, away from the seal.

That's a good tip.

John
 
4metals said:
A good scientific glassblower is a good guy to know. :D


Truer words!!! They are a rare breed, but most any of them that are in the business have to be good.


My questions:

How do you stir these reactors? The usual overhead stirrer deal with a teflon stir blade? Gas stirring? Pump stirring?


Comment:
I don't have any photos handy to show you what I'm talking about, but you might want to consider this arrangement instead of the usual flange for a reactor head--the clampless design:

It's more fragile and more expensive, but you can avoid using a clamp as the fumes won't leak out easily. A little bit of Kel-F (you should use this now!!) put into the groove will make for a great seal.

Some of the problem might be that your gasket/o-ring is the wrong elastomer and doesn't have enough give. You can always put a sacrificial copper gasket in lieu of PTFE or Viton.
 

Attachments

  • example.jpg
    example.jpg
    19.5 KB · Views: 1,368
semi-lucid said:
I'm curious to know what size vessel Harold generally used in his operation.
John
Aside from one handled Pyrex cylinder, size of which I do not recall, but it held about five gallons, I used nothing larger than 4 liter beakers and cylinders. Cylinders were used exclusively for precipitation of re-refined gold, with a target volume of roughly 18 ounces. Any more and great difficulty was experienced in precipitation. That was in spite of adding three liters of ice to the solution prior to precipitation of the gold.

You'll come to discover that large vessels get expensive real fast---so unless you have a real need, I recommend you stick with beakers 4000 ml and smaller, and use them in multiples when necessary. Unless you have an exceptional supply of material to process, it isn't likely you'll have need for large vessels.

Do keep in mind, my method of operation was to process individual batches, to avoid having to assay. Worked for me, and very well, for the entire duration of my business.

Harold
 
Lou,

I started with reactors in the mid '70's and at the time the joints were all ground glass. To replace a reactor to accommodate a new head seems excessive so I've always stuck with what I had because a collection of vessels which matched and were interchangeable with a bunch of heads. If I were re-tooling today I would look into the heads you describe. I use stopcock grease on the ground glass surfaces and clamp it. As I said to Semi, if you route the return from the condenser so it doesn't flow across the seal it's fine.

I never use a stirrer on these reactors for processing karat gold, never have, never needed it. For one I only mix karat so the silver is under 7 1/2 % so it doesn't crust over. Sometimes some small chunks get buried in silver chloride but I just leave it in the chlorides when I filter and reduce them with sugar and assay the silver bar for gold. As long as I know where the metals are I don't go after them on a lot by lot basis, that's too costly. I believe in assaying for accountability.

For simplicity sake Harold's setup of multiple 4 liter beakers can process a-lot of gold too! It comes down to lot size. For the small lab we are describing in this thread, Harold's way may do just fine. I just hope everyone knows to use heavy walled beakers for less breakage.
 
4metals (wish I knew/remembered your first name),

Dow grease (stopcock grease) is great for vacuum work and keeping stopcocks nice. Kel-F is a whole different animal--it's a fluorinated grease akin to other fluorocarbons with regards to inertness and it has a very low vapor pressure. It is not reactive at all--you can boil it in aqua regia and it would have no effect.


Beakers work great for evaporation and removing nitric acid, but I do not like them for dissolution--too much potential for spatter even with a good watch glass. If it's something really small, then erlenmeyer flasks are the way to go because most of your refluxing nitric and hydrochloric acids will condense before they make it out of the top neck. For doing really quick removal of nitric acid with zero losses, I suggest a rotary evaporator. They cut down time drastically.


Lou
 
Getting back to assaying for a minute. What would be the weight of a typical assay sample? Is there a range? I know I need to read a book or two to find the answers to questions such as this, but I haven't taken the time to read about assaying yet.
 
The sample size depends on the type material you are assaying. It also is determined by the size cupels and assay crucibles you are using. If you are assaying karat gold or other high value material, most people use 0.25 gm or 0.5 gm samples. It is always best to run at least two samples (duplicates).
 
Fire Assay of Karat scrap

Equipment for fire assay of Gold and Silver

Analytical balance capable of weighing to 0.0001 grams
Assay furnace (Vncella kilns) 8" x 8" x 8" nice small heats up quickly easy rebuild
Sheet metal hood and exhaust blower
Acid resistant exhaust hood and corrosion resistant exhaust blower
Hot plate (electric kitchen griddles are great and inexpensive)
Coors ceramic annealing cups
50 ml beakers
Wire brush
Cupel tongs
Heat resistant gloves
High temp crayon
Multi depression muffin tin (so you don't mix up samples)
tweezers
pliers
squeeze bottle

Supplies for fire assaying

Reagent Nitric Acid
Bone ash cupels 1 1/4" diameter
Sheet lead (foil) 3" X 3"
Fine silver shot
Bone ash
Distilled water

Procedure
Cupellation
1. Cut the lead foil into 3" squares and fold into "boats"
(a boat is made by folding the foil in half over your index finger crimp both ends fold one towards you and one away so the boat will stand up for you to put in the sample and the silver inquarts. Always wear gloves when handling lead.)
2. Weigh a sample of approx 0.5 grams of karat scrap and place in foil boat
3. Weigh out 1.5 grams of fine silver (to inquart the gold) and place in the foil boat
4. Roll the foil tightly around the sample and silver shot. Compact tightly by squeezing with pliers
(be careful not to squeeze too hard to force the sample to split out the side of the lead foil)
5. Prepare 2 samples for a gold assay in the same manner, if you need a silver assay prepare a foil boat
the same as above but do not add silver.
6. You now have 3 rolled up foil boats with the sample weights recorded ready for cupellation.
7. Preheat the furnace to 1850 degrees F
8. Number the cupels with the heat resistant crayon and place in the oven to pre-heat
9. When the empty cupels and furnace are up to temperature place the foil boats in the depressions
of the proper cupels.
10. Close the door of the furnace and wait about 10 minutes for the lead to melt, this is classically known
as the "opening" of the cupels. If you peek into the oven you will see all the cupels with a bright glow
of molten lead in the center of each cupel.
11. Be careful not to leave the oven open too long because you don't want to freeze the cupellations, a quick
peek through a slightly opened door should suffice.
12. It is now time to "drive the lead", this is accomplished by leaving the door open just a crack to allow
air to oxidize the lead which will be absorbed into the cupel along with all of the base metals.
13. After 30 minutes the door should be closed and the cupellation continued for another 15 minutes.
14. The beads will now appear to be bright shiny round balls of glowing silver. The furnace can be turned off now
and the cupels allowed to slowly cool. If you need to use the oven for more assays, you can remove the cupels
and place an old cupel on top of each hot cupel so it cools slowly and avoids spitting.
15. When the cupels have cooled, the bead can be pried (it should come easily) out of the cupel and the bottom
is buffed with a wire brush to remove any adherent bone ash.
Parting
16. It is now time to part the beads in the acid hood. The only beads that are parted are the samples you added silver to.
The beads that you didn't add silver to are usually gold in color, they are used to calculate the silver
content of the sample by subtracting the average weight of gold from the 2 samples you are assaying
for gold. The calculations will be at the end of the parting section.
17. You will be transferring the beads and gold from cupels to beakers to annealing cups so make sure you
number beakers and cups so there is no mixup.
18. Add the beads to numbered beakers and add 40ml of a mixture of 1 part nitric acid and 2 parts distilled water.
19. When mixing the acids, always add acid to water, never add water to acid!!
20. Heat the beakers for about 15 minutes in the first acid. The silver will dissolve and leave behind gold particles
which look like coffee grounds. When the reaction stops you can change the acid. The particles are heavy and
behave well. (meaning they rinse well and with reasonable care will not pour off when rinsing) Gently pour off the
acid leaving the gold at the bottom, squirt with a stream of distilled water from a squeeze bottle. After a few
seconds the gold settles and can be decanted as well.
21. All of the used acids and rinses contain silver, collect them in a glass bottle for future recovery, you can recycle
this silver and re use it over and over.
22. Now add a mixture of 1 part Nitric acid and 1 part distilled water to the beakers. Again about 40ml per beaker,
continue heating on the hot plate for 15 to 30 minutes.
23. Again decant and rinse the gold, saving the rinses as you did the first time. rinse well, at least twice.
24. Now transfer the gold into the annealing cups by flowing the granules with a stream of distilled water from the
squeeze bottle. Allow it to settle for a few seconds and carefully decant the water, again be careful not to loose
any gold particles by pouring too fast. Drain as much water as possible.
25. Place the annealing cups on the warm hot plate and allow them to dry, if you rush this step and the gold isn't dry
it will spit when annealed in the furnace and you will lose gold and have to start again!
26. Place the dry annealing cups in the furnace at about 1000 degrees for 5 minutes or until they glow from the heat.
27. Remove the annealing cups and allow them to cool.
Weighing & Calculations
28. The annealed gold will have a nice gold color and if it doesn't there are other precious metals in with the gold.
If the gold isn't a nice uniform yellow color after annealing the following calculations will not be correct. (because
your gold is contaminated with other metals)
29. Transfer the gold to the balance and weigh and record the weights.
30. Divide the ending weight in grams by the starting weight. Multiply by 100 to get % gold in sample.
31. To get a silver number weigh the small bead you did not part. Divide the weight of the bead by the starting
weight and multiply by 100 to get % gold and silver in the sample. Now subtract the average gold percentage
from step 30 from the gold and silver percentage to get the silver percentage. Reported as silver by difference.

If you need it I can post an Excel spreadsheet for the calculations.

This description is meant to get you started in fire assays of karat gold, there are many nuances which you will learn from experience. A good textbook to get you further is Fire Assaying by Shepard & Dietrich.
 
4metals,

The assay setup (cupellation only) you've outlined will only work for high grade gold such as karat gold, dental gold, or gold bullion. Since about 80 - 90% of the 10,000 plus fire assays I've done have been on electronic materials, I think that should be discussed also. Besides all the equipment, etc., that you've mentioned, you will also need:

Assay crucibles. For general work, I prefer the 30 gram size.
Cone mold - available in 2, 3, or 6 depressions.
Crucible tongs

Litharge (lead oxide). I prefer the yellow rather than the red.
Borax - anhydrous or borax glass
Soda ash
Sugar or flour. I prefer sugar.
Silica sand.
Other occasionally used chemicals such as fluorspar and yellow sulfur.

The furnace should be heavy duty with thick insulation. Otherwise, the temperature will drop severely when putting the cold crucibles into the furnace. I prefer Cress furnaces with good temperature controllers.
 
GSP

The list you gave for e-scrap is almost identical for the sweeps assays on jewelery materials as well. I have methods for that process as well, and will post them if anyone shows interest.

The only way I have assayed e-scrap is after it has been processed into either copper based bullion or digested in aqua regia. If you have any processing techniques to assay e-scrap I'd love to enter a discussion on the methods. I'm quite sure they would fit nicely into the general flavor of this forum.

Another addition to the list would be scorifiers and granulated lead for scorifications.

I have never seen or used yellow litharge, what is the difference and why do you prefer it?
 
4metals,

Excellent writeup. I have a few comments on the particular way I did things. I'm not criticizing. Both ways will work.

Equipment and supplies:
Hot plate - I found that an old electric skillet is excellent for parting and drying the gold. I assume that's what you meant. They are very controllable. If I used an actual hot plate, I would set the parting crucibles in a white, flat-bottomed CorningWare dish.
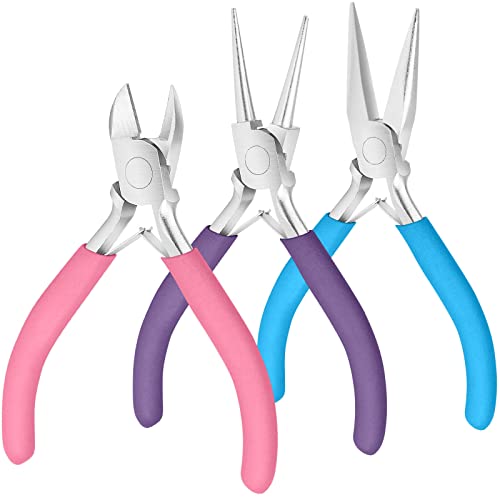
Pliers - See 15 below
Cupels - For silver assays, bone ash is best since you can see the feathers. For electronic assays, I prefer the composite cupels (bone ash + portland cement), since they are much more durable (and cheaper). Although about any size of 1 inch, or bigger, is good, I prefer the 1-3/4" size for electronic materials.
Coors ceramic annealing cups - Actually, annealing cups are clay and are made by such companies as DFC. I think what you mean are Coors porcelain crucibles. I prefer the high form ones that hold about 30 ml. I use them for parting, drying, and annealing.

Procedure:
8 - I usually numbered the crucibles, but not the cupels. It was too easy to keep track of them. At one place, we ran 36 cupels at a time in a beautiful DFC gas assay furnace. To keep track of the beads, I put them in a spot plate, on which I had numbered the depressions with a magic marker.
9 - I always preheated the cupels, at full temp., for about 20 minutes or more, before adding the lead. If you don't drive out all the moisture, the moisture will spit molten lead out of the cupel and you will have to start over. I also preferred to set the front row of cupels back about an inch from the front of the floor of the furnace. Otherwise, they can freeze up (turn black), since they can get too much air.
10 - 10 minutes seems like a lot of time, normally. Once the lead changes from black to a bright glow, they are ready to start driving. I would guess this normally takes 2 or 3 minutes. Rarely, some will stay black and won't open, no matter how long you leave them. You can try to open them by raising the temp and/or putting them in the back of the furnace. If this doesn't work, the last resort is to hold a splinter of wood near the top of the lead with tongs. The carbon will sometimes reduce the black lead oxide to lead metal. If this doesn't work, start over.
12 - Sometimes, if you have a lot of cupels, the ones in the back will take forever because they are not getting enough oxygen from simply cracking open the door. For this reason, I always drilled about a 3/8"-1/2" hole through the back of the furnace, centered and about 2" or 3" above the furnace floor. This allowed airflow over the top of the cupels.
14 - I don't like timing the cupellation. Some are done sooner than others, due to such things as their position in the furnace. Also, when cupelling the lead from the fusion of electronic parts, the weight of lead will vary. I like to remove each cupel from the furnace when it is finished. When the bead changes from a bright, rotating, glowing orb to a gray metallic bead, all the lead is out and it is finished. Silver sprouting can occur with a high percentage of silver or too high a temperature. I cupelled at about 1750-1800F. Gold losses can occur with sprouting. If I had trouble with sprouting, I covered the cupel carefully with an equally hot upside down cupel and then removed both together from the furnace. This doesn't work as well with bone ash, since it can easily crumble when handling it with tongs, especially when the cover cupel is used multiple times.
15 - I found that 6" electrician pliers work well for removing stuck beads from cupels. Use them vertically. Squeeze and twist. The slight squeeze will loosen any bone ash that is stuck to the bottom of the bead. It can then be easily brushed off.
16 - If you're only interested in gold, add silver to the original sample. If you are interested in both gold and silver, the procedure is - wrap in lead and cupel - weigh and record the weight - wrap in lead with added silver and cupel - part - dry - anneal - weigh - calculate.
17-23 - I always flatten the bead using a very clean hammer and anvil before parting. I added about 15 ml of acid (Note: I only used .25 gm samples for karat gold and less acid was needed) to the porcelain crucibles and heated it to slight steam before adding the beads. I first used a 1/7, HNO3/distilled H2O mix. When I got no more fizzing, I decanted and rinsed 3 times with hot distilled water, allowing each rinse to heat for awhile on the hot plate. I also made sure the entire inside of the crucible was well rinsed down with water from a squirt bottle - otherwise, the dried silver nitrate can contaminate to gold. This was repeated with a 3/2, HNO3/distilled H2O mix. It is best to use reagent grade HNO3. However, if the technical grade contains no chlorides, it will work fine.
24-25 - I parted, dried, and annealed in the same porcelain crucible. I decanted so that the gold ended up all together in a pile on one side of the bottom of the crucible. Annealing was done on a triangle over a bunsen burner. The gold must be thoroughly dry before annealing or it will spit out of the crucible. The gold will quickly change from brown to golden color when annealing. The hot crucible was set on a firebrick, or other good insulator, to cool before weighing. If you set it on metal, the crucible will crack, with a loud pop.

I have never seen or used yellow litharge, what is the difference and why do you prefer it?

The yellow litharge is PbO and the red oxide is Pb3O4. Actually, the yellow is called litharge and the red is called red lead oxide. The percentage of lead only varies by a couple of percent. I don't really remember why I preferred the yellow, other than that's what all the books recommend and that's the way I was taught. I have used both and they both will work. I remember that there were slight differences in their usage, but I can't recall what they were.
 

Attachments

  • decanting.gif
    decanting.gif
    10.7 KB · Views: 860
GSP

I was just the opposite of your experience, of the thousands of assays I've performed 90 % were jewelery related (cupellations and fusions) and the balance e-scrap. Your tips and suggestions, all excellent, are the things I have personally experienced as well but are the things learned by actually doing assays. Like feathers and the way a bead looks if it has Platinum in it.

For this reason I feel strongly that any serious assayer should have a bookshelf with books on classical fire assay at his or her disposal. I've been fortunate to have on my shelves the following books, all well worn, and all providing a well needed direction from time to time.

Fire Assaying by Shepard & Dietrich
Analysis of Noble Metals by Beamish & Van Loon
The Metallurgy of Gold by Sir T.K. Rose
A Textbook of Fire Assaying by Bugbee
The Sampling & Assay of the Precious Metals by Smith

and finally Practical Assaying by Mitchell I have a 5th edition printed in 1881, it has a terrific section on blowpipe assay techniques.
 
I have the first 4 books, hardbound. I prefer the Shepherd and Dietrich and the Bugbee. I think both have been reprinted and are available at a fair price.

The last one is available here in pdf:
http://books.google.com/books?id=i_JMAAAAMAAJ&pg=PA237&lpg=PA237&dq=assaying+smith&source=bl&ots=fIso7h1poh&sig=5Vy2J417guUumYLtvvTK1bYx0WE&hl=en&ei=gxz-Sfu1II3NlQewiJGWCw&sa=X&oi=book_result&ct=result&resnum=7#PPP1,M1

I also have about 20 other old assay books, in pdf, that I downloaded from Google books.
 
Ok now it's time to do some refining in our little lab.

Let's start with karat gold jewelry the no left over method.

The no grief method for refining jewelry scrap.

This method is for refining karat jewelry scrap by inquartation. The silver is recycled and used over and over again to inquart more karat. The plus of this method is you will never end up with un-dissolved pieces of gold, and if you are a jeweler you can semi-refine and reuse the gold without the aqua regia step.

1. Weigh your scrap and either melt it and assay to obtain an exact assay or estimate the fine gold content.
2. Add fine silver equal to 3 times the fine gold content and melt together, do not add flux, and pour the stirred alloy into cold water.
3. The resultant metal is called popcorn shot or cornflake shot mostly because it has a large surface area which helps it dissolve quickly in the next step.
4. Digest the scrap from step 3 in a mixture of 1 part distilled water to 1 part nitric acid.
5. When the reaction is complete filter the solution and rinse in distilled water. The residue on the bottom will be mostly gold but it looks like coffee grounds.
6. Take the coffee grounds, rinse them into a beaker with distilled water, decant the excess water and heat the beaker with the gold in a solution of 1 part distilled water to 2 parts nitric acid.
7. Filter the residue and collect on a filter paper. The second nitric dissolve will have dissolved the majority of the remaining silver and rinsing well here will directly affect the purity of your product. For that reason I recommend vacuum filtration. It will assure the water containing dissolved metals is separated from the gold and can be rinsed clean.
8. The mud remaining in your filter is very high grade gold usually 99+% with the primary contaminant being silver. Depending on what you are doing with your gold will determine what you do next. If you are making alloy for jewelry you can melt the gold with a flux containing Manganese Dioxide which will scavenge the remaining silver and can produce gold approaching 999. This can be alloyed with silver and copper to make nice new alloy, having only semi refined the material.
9. If your goal is 9995 gold, you will now need to refine this high grade gold. If you are refining it further, skip the melting step 8 because the granular gold which looked like coffee grounds will dissolve very fast if you don’t melt it.
10. Before we proceed with the final refining process, let’s attend to the silver from the inquarting process.
11. Mix all of the acid from the first and second nitric treatment, and add sodium chloride (salt) to drop the silver as a chloride. It will come down like heavy white snow. After it settles add a pinch more salt until you are sure no more silver is in solution.
12. Filter the liquid to collect the silver chloride and rinse it well. Here again a good vacuum filtration will benefit the end product.
13. The acid can be treated as it contains no significant PMs.(waste treatment)
14. The silver chlorides can be reduced to metal by either the frying pan method or the sugar method, Both of which have been discussed on the forum.
15. Now we can concentrate on the final refining of the gold. Place the gold in a mixture of 4 parts hydrochloric acid and 1 part nitric acid. Add the acid slowly and continue adding until all of the metal is digested. This will go quickly because of the small particle size of the coffee ground appearing gold you started with.
16. Add ice to the acid before filtering, this will lower the solubility of the traces of remaining silver and allow them to be filtered out easily.
17. The acid from this step will be a bright red color as all of the base metals were leached out in the nitric digestions. Carefully in a container which is only half filled so the reaction has room to rise, add urea prills. Be careful here, until you have a feel for how reactive urea can be, add slowly and stir gently. When the prills you add begin to float at the surface of the acid and not dissolve, you have added enough.
18. If you didn’t add enough urea to kill off the nitric, it will burn off when you begin to precipitate the gold so it’s wise not to add too much.
19. Now begin to add your precipitant. Sodium metabisulfite will drop cleaner gold than ferrous sulfate. (mostly due to rinsing) Add slowly and stir gently and test with stannous chloride until the precipitation is complete.
20. I have never had to drop out the lead and tin from the acid but some members may prefer to do it and I would appreciate some input from those who have done this more than I have. I take precautions to keep the stannous solution away from the aqua regia, some guys actually dribble it into the acid and at the same time are adding tin. I place a drop of the acid to test on a paper towel and add the stannous to the towel. A drum of burnable paper waste stored in the refinery is burned and processed as sweeps when it accumulates.
21. When the gold is dropped, it is again rinsed with hot distilled water, and then cool distilled water. (Some use ammonium hydroxide here, I usually don’t) Vacuum filtration here helps the purity of the product.
22. This gold can be melted, this time without flux, only a small pinch of borax to assure all of the gold pours out of the crucible will be needed.

As an exercise in learning the art of refining, it is a good practice to follow this method before you start with shortcuts. This method also assures the silver in the karat you are refining is recovered as well, something direct aqua regia does not assure. The chlorides coming off direct aqua regia refining contain gold which has to be recovered as well. I would also melt the gold product of the semi refining first step (at least once) just so you can see just how pure it is at that stage of the process.
 
Status
Not open for further replies.
Back
Top