• Please join our new sister site dedicated to discussion of gold, silver, platinum, copper and palladium bar, coin, jewelry collecting/investing/storing/selling/buying. It would be greatly appreciated if you joined and help add a few new topics for new people to engage in.

    Bullion.Forum

Non-Chemical E-scrap mechanical processing videos

Gold Refining Forum

Help Support Gold Refining Forum:

This site may earn a commission from merchant affiliate links, including eBay, Amazon, and others.

macfixer01

Well-known member
Joined
Aug 18, 2007
Messages
1,154
Location
Michigan
Hi All,
I've been considering for awhile now making some videos on the mechanical processing of e-scrap as a way to give back to the forum. I'm not referring to the chemical processing which is already well covered on the forum, but just the mechanical processing such as removing pins from boards and connectors for example. Handling many types of e-scrap are more or less obvious, but certain types of connectors can be difficult to get apart, or sometimes easier or faster methods or tools might be available. I don't know if anyone here will find them useful, and I'm not claiming to be any expert. If one of you thinks they have a better method then please share it.

I just wanted to welcome anyone who wants to, to look at my videos linked below. The longest video is about 11 minutes, but most are around 7 minutes or less. Although I tried to give them short titles, most cover more than one technique or type of source material as things came to mind. Those of you who process scrap professionally and are doing hundreds or thousands of pounds may have no interest. I'm just a hobbyist though, and most times I get my scrap 50 pounds at a time or less so tend to work on small batches.

Just a quick disclaimer: I'm not a professional videographer either, so things may occasionally go out of frame briefly but I think I've edited out most flubs and long pauses. I used my iPad camera so if you're offended by video's shot in portrait aspect ratio then save yourself heartache and don't watch them. I'm sorry but that's what I had to work with. The resolution is good though so you can blow them up. Thanks!

http://youtu.be/LcTSMRi9Sco
http://youtu.be/TB6GO8GR0qA
http://youtu.be/JYdW2KghPvk
http://youtu.be/ZvXMKNSqRME
http://youtu.be/L1ng_wdhlCk
http://youtu.be/0fjEr5FCxIg
http://youtu.be/d8WlgBeBtDM
http://youtu.be/JPg7Sy4z5bk
 
I have a minor variation on some of your processes that seems to work well for me. On the plugs (like in the last video), those little tabs are actually "locks" used to secure the pins in place and prevent the pins from backing out after installation. Sometimes, a paper clip or a miniature precision screwdriver fits into the plastic shell and allows the springy lock to be compressed to where the pin almost falls out on its own.

On the edge board connectors you showed (I think you said they were from CNC machines), I have had a decent amount of success grabbing the first connector on the board with a pair of needle nose pliers and then "rolling" the pliers. This makes use of the rounded edge of the pliers and "levers" the connector out.

I have also made some wire wrap circuit boards. The color of the wires is usually used to help identify what the wire may be used for. Black was always a DC Negative when I built anything. Red was DC positive, and the other colors denoted different signal functions. Wire wrap wires are always very small gauge wires and the most common sizes range from 26 gauge to 30 gauge. The posts the wires are wrapped on are square with sharp (not rounded) edges. The insulation is very thin, and is always easy to strip off. The actual process of wrapping the wire around the post means that the edges of the post cut into wire as it's wrapped around. This helps make a good connection without the use of solder. Having said that, I have even seen a few that were soldered as well. I suspect they may have had military applications, or might have been used in environmentally unfriendly applications.

I did have one or two military connectors which were real buggers to work with. They had a snap ring inside the housing which prevented the internal assembly with all the pins from being pushed in or pulled out. Sometimes, the snap rings are very difficult to see. The pins in the connectors I had, had been pushed through holes in a red rubber material. The actual holes were a smaller diameter than the pins and ended up grabbing the pins like a vise. Probably helped make the connector weatherproof as well. Underneath that was a very hard plastic. I ended splitting the shells with a hack saw and then cutting the rubber with a hobby knife. Finally, the pins came out easily.

EXCELLENT VIDEOS. Very informative and thorough. You took a lot of time making them and put a lot of thought into them. From an old timer who has tried to recover values from many strange connectors, it was nice to see that many of the methods I have used are generally the accepted ways of doing things, and are used by many others. Many times, there is no right way or wrong way to do something. It is whatever works best for a particular individual and what tools they have on hand. I have never owned an arbor press, but it sure would have made a lot of my work easier. I am certain many newcomers will benefit from what you shared with all of us. THANK YOU!
 
[youtube]http://www.youtube.com/watch?v=LcTSMRi9Sco&feature=youtu.be[/youtube]

[youtube]http://www.youtube.com/watch?v=TB6GO8GR0qA&feature=youtu.be[/youtube]

[youtube]http://www.youtube.com/watch?v=JYdW2KghPvk&feature=youtu.be[/youtube]

[youtube]http://www.youtube.com/watch?v=ZvXMKNSqRME&feature=youtu.be[/youtube]

[youtube]http://www.youtube.com/watch?v=L1ng_wdhlCk&feature=youtu.be[/youtube]

[youtube]http://www.youtube.com/watch?v=0fjEr5FCxIg&feature=youtu.be[/youtube]

[youtube]http://www.youtube.com/watch?v=d8WlgBeBtDM&feature=youtu.be[/youtube]

[youtube]http://www.youtube.com/watch?v=JPg7Sy4z5bk&feature=youtu.be[/youtube]
 
Thanks to all for the positive comments. If or when I have more to post I'll try to shoot them with the camera turned since I know the orientation bothers some. I've never done much with video formatting or editing, except for ripping DVD's, converting other formats to AVI's, and so on. I at least hoped to remove the black margins, and the Aimersoft video converter ultimate software that I tried to use has a cropping function. It just didn't seem to work for me though.

Thanks to Palladium for reposting the links with thumbnails. Somehow I thought when I inserted them into the post as URL's that might happen automatically, but I guess it does not.

To bswartzwelder: I do remove pins using a small screwdriver, paper clip, or X-acto blade tip to release them in connectors where possible such as female IDC's. I don't recall now what I tried originally on those turquoise plugs, but I'm sure I would have tried an easier way first if possible. The locking tabs on those forked pins are pretty strong and probably too hard to bend with a paper clip, and I believe there is too much space in the connector anyway for one to work. I'm pretty sure I would have tried a small screwdriver too, but maybe just didn't have the right size to make it work? At this point I don't have any more of them to try it on. Military connectors are challenging, there are so many different types and methods to get them apart. On a lot of them you can get to the locking ring one way or another and slide the pin block out. Some only succumb to forcing out the whole pin block with a punch and arbor press, pressing out the individual pins, or as you mention cutting the shell and breaking it off then cutting away the rubber or plastic from around the pins. Next time I locate a batch of them maybe I'll make a video on those also. You are quite correct that there is no right or wrong way to do most of these things, whatever works for you is best unless you come across a faster or easier method.

macfixer01
 
macfixer01 said:
Thanks to Palladium for reposting the links with thumbnails. Somehow I thought when I inserted them into the post as URL's that might happen automatically, but I guess it does not.
Correct. In order for the link to display, you must post it this way:

Code:
[youtube]LcTSMRi9Sco[/youtube]
Note that only the last portion of the link is included, and it is the first link you provided. It is displayed here as code, so it does not activate. Yours would not include the use of the code button.

Note also, that it's best to post them both ways, as the embedded link does not permit the display full screen. For those who wish to see it that way, they can click the entire link.

Harold
 
When in doubt, use preview to see how the post will appear.

... or why not always use it. I do on every post, and I catch a lot of formatting and spelling errors.

Göran
 
Göran,
Many times I find my self hitting the submit button before proof reading my post, and then catching my mistakes, or missing the mistake until others find them.
I just tried the preview button
Thanks
 
It's just common sense. It seems like an average thread is read 100 times per posting. If I think I have something I want 100 persons to read then I maybe should take the time to read it twice myself to catch any mistakes before submitting it.

8)

Göran
 
FYI - I posted a new video to Youtube last night.

http://www.youtube.com/watch?v=kplGIIBCNw0

[youtube]http://www.youtube.com/watch?v=kplGIIBCNw0[/youtube]

macfixer01
 
Thanks for the videos. I subscribed to your channel as well. Always nice to know that the youtube channel has some real experience and not someone just being a "flash in the pan".
 
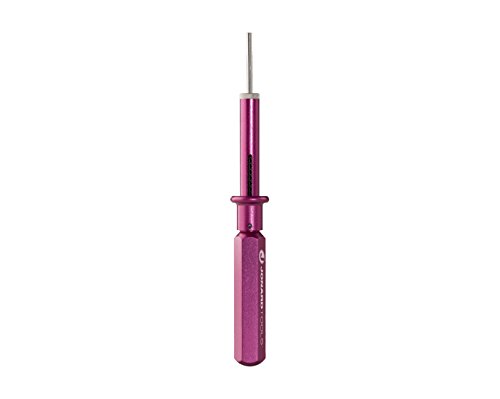
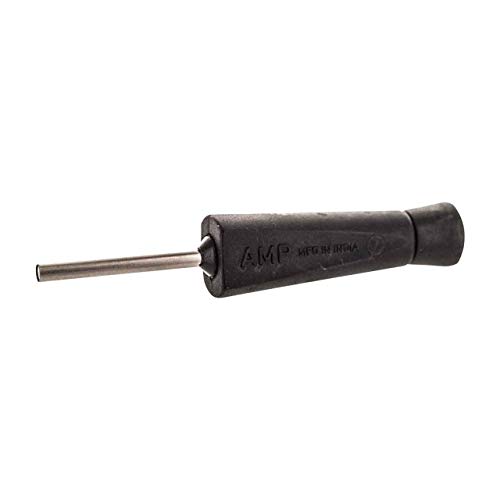
macfixer01, Thank you for the videos. They are very helpful. I am a Navy veteran(F-18 Electronics tech) so I have spent many hours removing and installing pins. For every mil-spec connector there is always a tool to remove and install pins. The most common ones are referred to as blue and white, red and white...ect. Here is a picture:
126-007.01_s500_p1._V9a143e96_.jpg
I found a seller on eBay selling a 25 piece assortment for $25 These tools make quick work of the locking mechanism on most mil-spec connectors and with the tool if you get good you can take out pins in less than a second (it used to take me about 30 minutes to remove, label(real time killer) and re-install 128 pins into a new connector. It also took alot of that time to find the right pin and right hole. Be careful when using the plastic tools like the one pictured as you can break them if you apply to much pressure, it is more of a finesse job. You find the right size that slips over the back of the pin then you push the tool into the locking mechanism then you simply pull the pin out from the backside.

Just Google search "mil spec plastic removal tools" and you will find plenty.


edited spelling- Lee
 
Thanks for your time and I will be watching tonight after this thought.

The paper clip is too soft to really do much on pin removal.
I found that the metal end of a throwing dart..wooden darts are tougher.. when ground flat make a nice hard small spade that is tough to break and so works great for those tabs.

Thanks again and hope to contribute where I can.

B.S.
 
Thanks guys for the information. Regarding the pin removal tools, I do have a few odd ones around here. Mostly the ones with the copper pieces for removing pins from DB-xx shell type connectors. That 25 tool assortment sounds like a good investment if it's still that cheap. The supply of connectors seems to have dried up recently though? I really haven't come across any for sale in the last several months on Ebay.

macfixer01
 
'Pin Pushers' Rock. There are no substitutes. Maul pins swapping modules Sunday 1st shift on a skeleton crew a pin-pusher is your only friend, I've been there...

Finding the correct junction tool kit made by the original manufacturer 20, 40 or more years gone is nearly impossible unless you're in an aerospace town. Those tools are sturdy and will last years of assembly line daily use and can be $200+ plus each new. The plastic multi-kits are a repair or troubleshooters tool and made for occasional use. Can I say 'BE CAREFUL' with them enough?
 
Unless the pins will be re-used, i cant understand the need to be gentle. As a scrapper with nearly forty years experience in disassembling most everything, I've come to realize that junk is junk. The person buying your junk isn't buying it for it's aesthetic beauty but rather for it's weight. It doesn't have to be pretty, it just has to be clean.

I guess what I'm trying to say is, a piece of junk doesn't have to be in one piece to be worth junk. It can be in as many pieces as it takes to get it separated and clean.
 
Something very satisfying about having a 60, 80 or 100 pin connector stripped out in a minute or two, a bucket full in an hour.

I completely agree on junk being junk - it's just the sweetness of three seconds to release each pin without any risk of injury, collateral damage or making a gawd awful mess... or all three.

Having the pins' wiring ready to be uncrimped/unsoldered without wrestling with bent & crushed bodies by punching or shearing is working mo' smarter too :)
 
The reason to be careful with the plastic tool is that the tool breaks easily. Once you get a feel for it they can last a long time without breaking. DMC makes the metal expensive type and if you have the NSN or mil-spec numbers of the connector you can buy these, however they are not cheap. The plastic ones are cheap and you can get them in bulk(for breakage). I have to agree its not about taking them apart pretty, its about taking them apart fast, with little effort, and no excess mess.
 

Latest posts

Back
Top