Hello guys,
I recently became interested in refining and still reading a lot on the process as in this area I am still a newbie.
What I noticed was that some people are trying to build electric kilns and in this area I do have some experience, so I wanted to contribute a little of what I know on this process to the forums. Maybe this is a help for some of you kiln builders.
This comes in two parts, first the build of the furnace, second the theoretical part of how to design the proper elements.
Overall there are three considerations:
1. decide of a Wattage the furnace must have for a given size
2. from this you calculate the element
3. checking for one of the most important factors: surface load of the element so its longlived and does not melt down when in use.
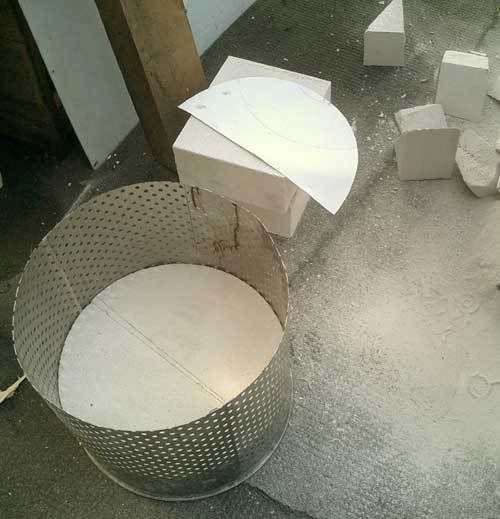
As outer shell I used an old clothing bin which I had laying around.
For insulation I used a porous stone used for insulating houses and such sold under the brand name Ytong here in germany.
pro: insulates well, cheap, readily avaliable, easy to work with.
Con: usable only for temperatures up to 1000-1100°C, will see how it holds up over time.
Heating is acommplished with a coiled nicrome 80/20 wire which is good for temperatures up to 1200°C
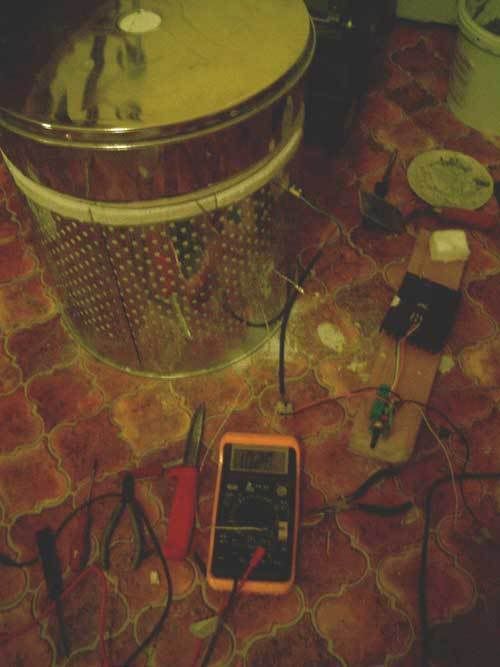
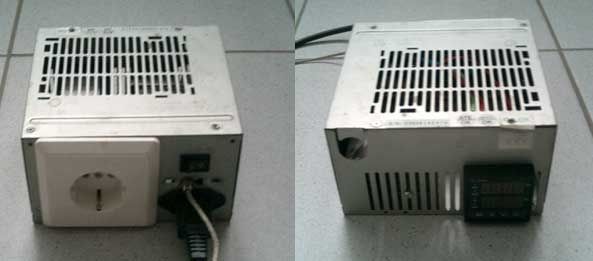
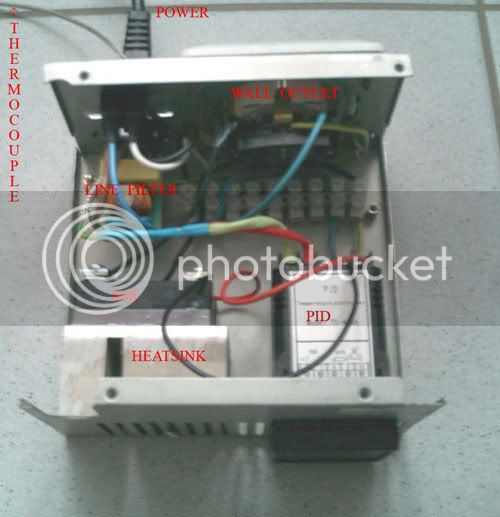
For controlling the power I used a 2600W /15A power control (brand:Kemo)
I decided on 2000W of power for the kiln. with 230V this gives me 26,45 Ohms. the wire has 1,4 Ohms/meter so i needed 18,89m of wire to get 2000Watts.
surface load of the wire is ca 3,4 Watts/cm2 which is a little high if the furnace is used longer times at top temperature but for the intended 1000°C it will suffice.
You could also have built a quare one but had the round container on hands so it was a round one.
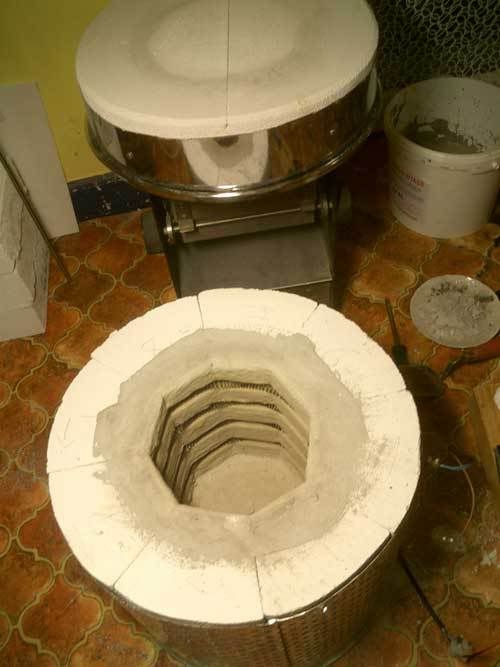
First the clothing bin was cut to size and a bottom was fit in. The Ytong stone is easily shaped with saw and rasp.
Then a cutting jig was built to saw the stones to 22,5 degrees so that eight of them will fit and make a good chamber. The outside of the angled blocks was fitted to inside shape of the shell with a rasp. For a perfect fit the stones were ground against each other and installed in numerical order.
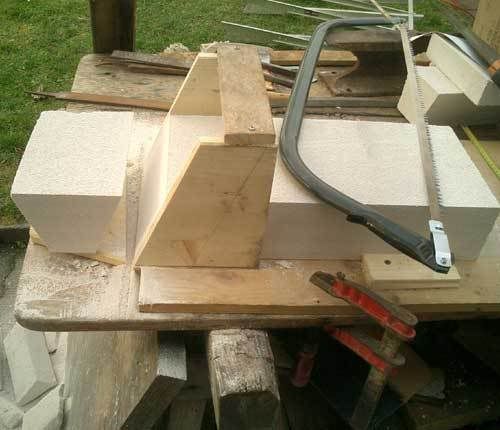
Then the inside of the blocks was grooved to hold the element and painted with a thin coat of fire cement. The coiled element was fitted in the grooves and the ends lead outside to connect power.
In similar way to the bottom the lid was manufactured from two halves cut from Ytong and fit into the lid. The blocks are held in place by a few nails round the outside of the lid.
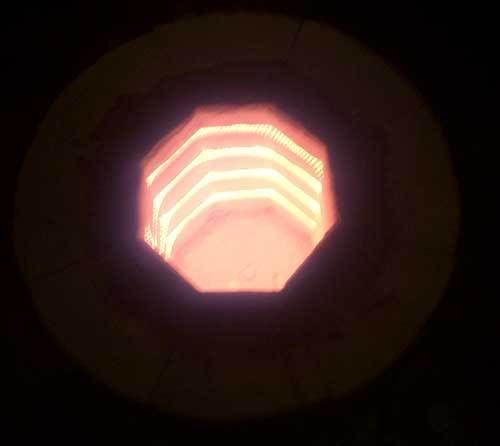
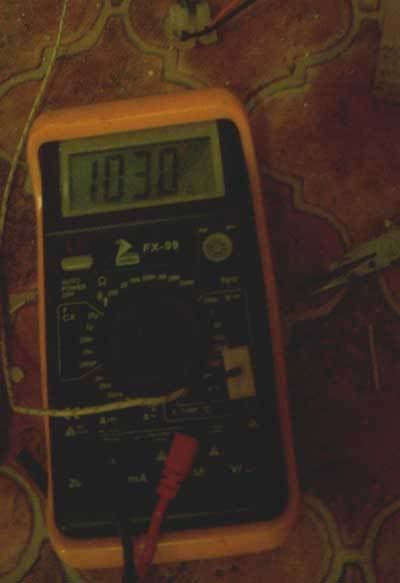
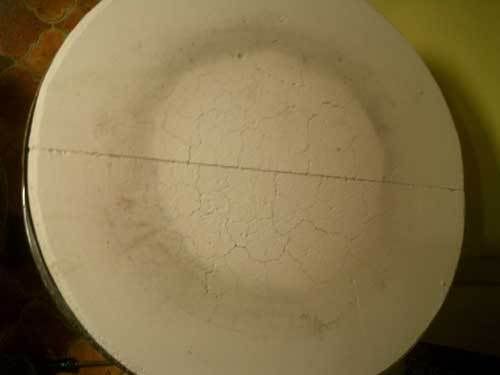
After drying the kiln was fired nd went up to 700°C in 16 minutes after 25 minutes the thermocouple reads 1030°C with the temperature still slowly climbing. the outside of the kiln only gets up to 50-55°C which speaks for the good insulation of the used Ytong blocks.
After 4 firings now the kiln still holds up fine, no cracking on the inside only the lid shows some minor cracks but structural integrity is not compromised so far. The lid was also coated with the fire cement but it fell off right after the first firing.
The total cost of the kiln was:
- 5 blocks of ytong 60cm x 20cm x 10cm at 1,45 each = 7,25
- 25m of Nicrome wire 1mm = 4,99
- Clothing bin = free
- power controller = 8,47
Total = 20,71€
I dont think that the kiln will hold up forever but I did not want to spend so much money. Total time needed to build this thing was 2 days. So at 20 bucks and 2 days I now have a kiln that reaches 1000°C at least and I did learn enough so that the next one can be more sophisticated. At 2000W the cost of running it is much lower than using gas. Over here gas prices go right through the ceiling.
Designing of the elements:
It was built according to the information on tube furnaces from Georg Brauer, Handbuch der präparativen anorganischen chemie, Volume 1.
At fist you will need he size of the furnace and the temperature it will have to reach:
>
For every cm2 of surface area of the kiln you need a certain amount of watts to reach specific temperature.
From Brauer:
Temperature in °C , Multiplication factor
300 , 0.2
400 , 0,4
500 , 0,6
600 , 0,8
700 , 1,0
800 , 1,3
900 , 1,6
1000 , 1,9
1100 , 2,2
1200 , 2,6
1300 , 3,0
1400 , 3,5
As this rule of thumb is for tubular furnaces I did neglect top and bottom area.
With a chamber of 14cm x 20cm this gives me a surface area of 879,6 cm2
I wanted it to reach at least 1000°, but nicrome wire is capable of max 1200° so I chose 1100°
880cm2 of surface area x 2,2Watts = 1936 Watts total power needed
To simplify further calcuations = 2000W
The avaliable power supply is 230V AC.
What we want to do now is to calculate the heating element:
To do this you use R = U^2/P, r =(ohms), U =(Volts), p=(watts)
with 230V and 2000W i get a resistance of 26,45 Ohms
Now you look at your wire, mine was 1mm nicrome wire with a resistance of 1,4 Ohms/meter
You just divide 26,45 by 1,4 which gives the length of wire of 18,89m
Now you check if the wound element is fitting in your kiln. Diameter o the coil should be 10-15 times wire diameter, spacing between single windings minimum = wire diameter
If wound on a center rod of 10mm diameter one winding is 3,77cm
with 18,89m I get 501 windings. With wire diameter 1mm unstreched coil is 50,1cm long with minimum stretch of 1mm between windings ca 1m but can be stretched to needed length easily. You just have to watch hat the minimum stretched coil is not too long to fit inside your kiln chamber.
It also does not have to be one single coil, it can be divided into smaller coils which are put in series. only overall wattage must be the same.
If the coil gets too long switch to a wire diameter with higher resistance (usually smaller diameter) this will shorten the length of the element but at the same time surface load will increase. You will have to balance the factors a bit to get optimum performance.
Now you are almost done. Another important fator for the longlivety of your heating element is surface load per Area. The brauer tells us that at lower temperatures up to 900 a surface load of 3,5Watts/cm2 and for higher temperatures e.g. 1350° a surface load of 1,5Watts/cm2 is appropriate for continuous use of the furnace.
You now take your watts and divide by total surface area of the needed wire.
18,89m of 1mm wire gives a surface area of 593,44 cm2
2000W/593,44cm2 = 3,37W/cm2
If used permanently at top temperature the surface load is a little too much , you will not have the elements melt but the life of the elements is reduced some hours but at the intended temp of the furnace it fits.
If you have any further questions or additional information please feel free to ask I will try to answer the best i can.
ps: there is a phenomenon called resistivity that means the wire will change its resistance when temperature climbs, this was neglected in calculation but should change the length of the wire only a small amount (usually shorten it) which will dop the wattage a bit. roughly calculated I will have 1900W not 2000w at top temperature. There is also a Method to calculate the element using a formula which uses the resistivity but as this only leads to a few centimeters difference in the calculated wire I still use the simpler above described method. This has worked for me so far, the kiln is still running fine and I did not have any problems so far.
I think this method is not the absolute pro way of kiln designing , you can go into this much further e.g. calculating with resistivity, conductivity and thermal mass of the used refractory to reach certain heating rates but as said before this is what I have done an it works just fine.
The kanthal handbook at kanthal.com is also a very useful source for all who want to build a kiln, it gives plenty of data on the performance of wires ,maximum recommended surface load in different applications and so on.
You can adapt the above principles to your avaliable needs and materials as needed.
Regards
Ralph
I recently became interested in refining and still reading a lot on the process as in this area I am still a newbie.
What I noticed was that some people are trying to build electric kilns and in this area I do have some experience, so I wanted to contribute a little of what I know on this process to the forums. Maybe this is a help for some of you kiln builders.
This comes in two parts, first the build of the furnace, second the theoretical part of how to design the proper elements.
Overall there are three considerations:
1. decide of a Wattage the furnace must have for a given size
2. from this you calculate the element
3. checking for one of the most important factors: surface load of the element so its longlived and does not melt down when in use.
As outer shell I used an old clothing bin which I had laying around.
For insulation I used a porous stone used for insulating houses and such sold under the brand name Ytong here in germany.
pro: insulates well, cheap, readily avaliable, easy to work with.
Con: usable only for temperatures up to 1000-1100°C, will see how it holds up over time.
Heating is acommplished with a coiled nicrome 80/20 wire which is good for temperatures up to 1200°C
For controlling the power I used a 2600W /15A power control (brand:Kemo)
I decided on 2000W of power for the kiln. with 230V this gives me 26,45 Ohms. the wire has 1,4 Ohms/meter so i needed 18,89m of wire to get 2000Watts.
surface load of the wire is ca 3,4 Watts/cm2 which is a little high if the furnace is used longer times at top temperature but for the intended 1000°C it will suffice.
You could also have built a quare one but had the round container on hands so it was a round one.
First the clothing bin was cut to size and a bottom was fit in. The Ytong stone is easily shaped with saw and rasp.
Then a cutting jig was built to saw the stones to 22,5 degrees so that eight of them will fit and make a good chamber. The outside of the angled blocks was fitted to inside shape of the shell with a rasp. For a perfect fit the stones were ground against each other and installed in numerical order.
Then the inside of the blocks was grooved to hold the element and painted with a thin coat of fire cement. The coiled element was fitted in the grooves and the ends lead outside to connect power.
In similar way to the bottom the lid was manufactured from two halves cut from Ytong and fit into the lid. The blocks are held in place by a few nails round the outside of the lid.
After drying the kiln was fired nd went up to 700°C in 16 minutes after 25 minutes the thermocouple reads 1030°C with the temperature still slowly climbing. the outside of the kiln only gets up to 50-55°C which speaks for the good insulation of the used Ytong blocks.
After 4 firings now the kiln still holds up fine, no cracking on the inside only the lid shows some minor cracks but structural integrity is not compromised so far. The lid was also coated with the fire cement but it fell off right after the first firing.
The total cost of the kiln was:
- 5 blocks of ytong 60cm x 20cm x 10cm at 1,45 each = 7,25
- 25m of Nicrome wire 1mm = 4,99
- Clothing bin = free
- power controller = 8,47
Total = 20,71€
I dont think that the kiln will hold up forever but I did not want to spend so much money. Total time needed to build this thing was 2 days. So at 20 bucks and 2 days I now have a kiln that reaches 1000°C at least and I did learn enough so that the next one can be more sophisticated. At 2000W the cost of running it is much lower than using gas. Over here gas prices go right through the ceiling.
Designing of the elements:
It was built according to the information on tube furnaces from Georg Brauer, Handbuch der präparativen anorganischen chemie, Volume 1.
At fist you will need he size of the furnace and the temperature it will have to reach:
>
For every cm2 of surface area of the kiln you need a certain amount of watts to reach specific temperature.
From Brauer:
Temperature in °C , Multiplication factor
300 , 0.2
400 , 0,4
500 , 0,6
600 , 0,8
700 , 1,0
800 , 1,3
900 , 1,6
1000 , 1,9
1100 , 2,2
1200 , 2,6
1300 , 3,0
1400 , 3,5
As this rule of thumb is for tubular furnaces I did neglect top and bottom area.
With a chamber of 14cm x 20cm this gives me a surface area of 879,6 cm2
I wanted it to reach at least 1000°, but nicrome wire is capable of max 1200° so I chose 1100°
880cm2 of surface area x 2,2Watts = 1936 Watts total power needed
To simplify further calcuations = 2000W
The avaliable power supply is 230V AC.
What we want to do now is to calculate the heating element:
To do this you use R = U^2/P, r =(ohms), U =(Volts), p=(watts)
with 230V and 2000W i get a resistance of 26,45 Ohms
Now you look at your wire, mine was 1mm nicrome wire with a resistance of 1,4 Ohms/meter
You just divide 26,45 by 1,4 which gives the length of wire of 18,89m
Now you check if the wound element is fitting in your kiln. Diameter o the coil should be 10-15 times wire diameter, spacing between single windings minimum = wire diameter
If wound on a center rod of 10mm diameter one winding is 3,77cm
with 18,89m I get 501 windings. With wire diameter 1mm unstreched coil is 50,1cm long with minimum stretch of 1mm between windings ca 1m but can be stretched to needed length easily. You just have to watch hat the minimum stretched coil is not too long to fit inside your kiln chamber.
It also does not have to be one single coil, it can be divided into smaller coils which are put in series. only overall wattage must be the same.
If the coil gets too long switch to a wire diameter with higher resistance (usually smaller diameter) this will shorten the length of the element but at the same time surface load will increase. You will have to balance the factors a bit to get optimum performance.
Now you are almost done. Another important fator for the longlivety of your heating element is surface load per Area. The brauer tells us that at lower temperatures up to 900 a surface load of 3,5Watts/cm2 and for higher temperatures e.g. 1350° a surface load of 1,5Watts/cm2 is appropriate for continuous use of the furnace.
You now take your watts and divide by total surface area of the needed wire.
18,89m of 1mm wire gives a surface area of 593,44 cm2
2000W/593,44cm2 = 3,37W/cm2
If used permanently at top temperature the surface load is a little too much , you will not have the elements melt but the life of the elements is reduced some hours but at the intended temp of the furnace it fits.
If you have any further questions or additional information please feel free to ask I will try to answer the best i can.
ps: there is a phenomenon called resistivity that means the wire will change its resistance when temperature climbs, this was neglected in calculation but should change the length of the wire only a small amount (usually shorten it) which will dop the wattage a bit. roughly calculated I will have 1900W not 2000w at top temperature. There is also a Method to calculate the element using a formula which uses the resistivity but as this only leads to a few centimeters difference in the calculated wire I still use the simpler above described method. This has worked for me so far, the kiln is still running fine and I did not have any problems so far.
I think this method is not the absolute pro way of kiln designing , you can go into this much further e.g. calculating with resistivity, conductivity and thermal mass of the used refractory to reach certain heating rates but as said before this is what I have done an it works just fine.
The kanthal handbook at kanthal.com is also a very useful source for all who want to build a kiln, it gives plenty of data on the performance of wires ,maximum recommended surface load in different applications and so on.
You can adapt the above principles to your avaliable needs and materials as needed.
Regards
Ralph


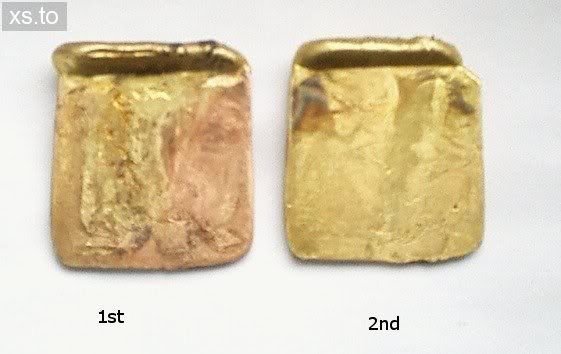
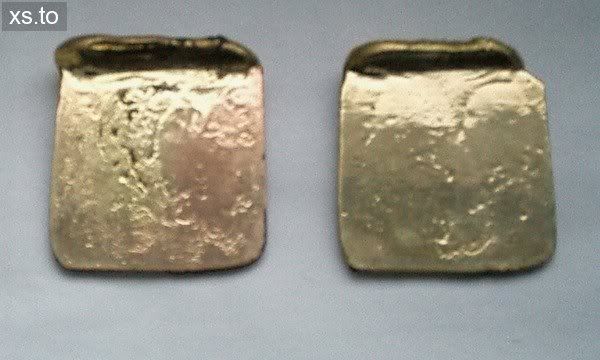
") First pic right after cast, second after some cleanup. The first ingot would obviously have needed more stirring. Second one came out much better, still some surface pitting but usable.
First pic right after cast, second after some cleanup. The first ingot would obviously have needed more stirring. Second one came out much better, still some surface pitting but usable.