everything you wanted to know about flux.....hopefully.
Making and using melt fluxes
What is flux and why do we need it?
The word flux is from the Latin meaning “to flow”. And that says it all, a proper flux blend helps the molten metal to pool and flow evenly, and completely, out of the crucible.
Flux is made up of a variety of dry powdered reagents mixed in specific proportions for different alloys and situations. The proportions of the ingredients are listed as parts.
Some melt shops prefer to add the ingredients separately for every melt, but I prefer to blend larger batches in the correct proportions and add it (pre-mixed) as required.
The effect of the flux often depends on the contact of the flux with the metal which you are melting. Once the metal has melted, the flux floats on top and the metal is collected in a pool under the flux. When re-melting slags containing beads, this is more important, also true with melting dental scrap. Clean karat scrap for example, will melt fine if added to a crucible and given a scoop of flux over the material. But other melts go much better if the flux can be in contact with the metal as it melts. For this reason, as a general rule, it is best to add the flux to a tray and add the material to the tray and mix them together. This mixture is fed into the crucible and melted, thus assuring contact for all melts.
Mixing the fluxes.
The following flux formulations are listed using a measure called parts. How big is a part? It doesn’t really matter how big a part is as long as whatever you use to measure that part is the same size for all parts. For example, a discussion of mixing the first flux on the list, sterling silver flux. The easiest way to do this is using full parts, so if our part is a coffee cup, look to see the part with a fraction of a part needed. So rather than guesstimate half of that coffee cup, simply add 1 full cup. Since that only required half a cup and you doubled it, you double every other quantity to maintain the proportion. So, it becomes…..
1 part silica sand
2 parts soda ash
4 parts anhydrous borax
By using parts, we can make batches as small or as large as we need. For fluxes you intend to make a lot of, a part can be a 2-pound coffee can, and for smaller lots it can be a coffee cup. As long as what you select to measure a part is the same for all of the ingredients.
The exception to this is the dental melt flux, the proportions are listed as percentages. You will need a scale to mix this type of flux.
For example, to make 1 pound of the dental flux multiply the 36% required of the first ingredient (Borax) by the final weight of flux desired. In this example a pound (approx. 454 grams) 454 x .36 = 163.44 grams. Weigh out (to the nearest gram) the Borax and add it to the container you will store it in. Use the same logic for every ingredient listed and add them all to the same container. Then simply mix the ingredients until it is homogeneous.
Storing the flux
It is best to store the blended fluxes in a seal-able container to keep air out. Some flux ingredients are hygroscopic which means they will absorb moisture out of the air. If stored in the open air some fluxes turn into a block which you will likely not notice until you try to stick your scoop into it. A properly fitting lid will prevent this.
And finally…..
Since most of the ingredients in a flux blend are white, or close to it, they all look pretty much the same in their buckets. Don’t guess, label the buckets properly! In addition to labeling the side of the pail, label the top so you can glance down and select the right container without pulling out the pails and tipping them to read the side.
What happens to all of the flux when it is poured from the crucible?
When the melt and flux are molten, remember the flux is lighter and floats on top of the denser molten metal. When you pour, flux will flow into the mold first followed by the metal. Some flux will remain in the crucible and flow out after all of the metal has poured out. This is good because it prevents the metal from sticking in the crucible. But often you will see the mold filling up and be hesitant to continue the pour.
Do not hesitate, keep pouring. All of the metal will displace flux out of the mold. If you have selected a mold with the capacity to hold all of the metal you melted, all of the metal will remain in the mold. Always placing a baking tray under the mold will contain any fluid flux that overspills the mold.
Sterling silver
2 parts anhydrous borax
1 part soda ash
1/2 part silica sand. Can use swimming pool diatomaceous earth
Thinning mix (not to be confused with thinning flux) This will thin a thick slag to make it pour and mix better. Very corrosive on crucibles. This flux additive is added as required to thin slags that are very thick. Add it sparingly to the flux already in the crucible and stir it in with a graphite rod to reduce the viscosity the flux.
1 part fluorspar
1 part calcium oxide (CaO, Lime, Type S, Unslaked)
Standard Karat Thinning flux. Used to prevent beads in slag. Used on karat gold so as not to hang up beads in the slag.
1 part Anhydrous borax
1 part soda ash
1/8 part fluorspar
Re-melting flux. For re-melting straight borax flux to recover beads
1/2 part Anhydrous borax
1 part soda ash
1/8 part fluorspar
Melt equal portions of this flux with borax flux containing beads. Beads are often hung up when straight borax is used for a melt. This blend will reduce the viscosity and allow the beads to pool. Pour this melt into a cone mold to recover the metal as a single button in the mold.
Dental material
36% Anhydrous Borax
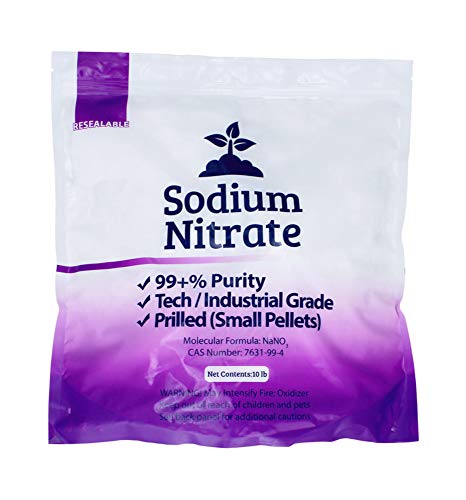
25% Sodium Nitrate
15% Cryolite (can substitute fluorspar)
12% Soda ash
12% Lime (slaked)
Start with a mixture of 75% material to 25% flux to begin. Load the crucible 1/4 to 1/3 full and heat to fluidize without spiting, add more flux/material mix until it is all in the crucible.
If slag is thick add additional Cryolite to thin it in small increments. Be careful Cryolite eats up crucibles.
Pour into a cone mold.


![Penagic Pens, P-223A, Gel Pens Fine Point [0.5mm] Black Ink, Roller Ballpoint Pens Matt Design, Stationery Pens for School Office Supplies](https://m.media-amazon.com/images/I/41nT+Qatb3L._SL500_.jpg)


